Learn Clojure By Building a Drug Dealer API — Part 3 [Endgame]
git commit -am “Improve DX, Implement POST route”


Photo by Jose Antonio Gallego Vázquez on Unsplash
In part 1 and part 2 of the series, we walked through setting up a Clojure application from scratch. Part two ended with a working GET route. In this part, we’ll upgrade our developer experience, introduce REPL and implement the POST route.
 Source code available at https://github.com/krimlabs/workshops (branch snapshot/dealer-api-part-3)
Updating the editor workflow
Till now, we have been copy-pasting the code from editor to the REPL running in the shell. A better way would be to run the REPL directly inside the editor!The workflow for each editor is slightly different. The core idea is to run the REPL as a server and make a client (your editor) connect to it.
To start the REPL server, install the nREPL (short for Network REPL) package. In your deps.edn, add the following top-level key:
:aliases
{:nREPL
 {:extra-deps
  {nrepl/nrepl {:mvn/version "0.6.0"}}}}
(My Emacs also urged me to add cider/cider-nrepl {:mvn/version “0.22.4”}, you might not need it for other editors.)
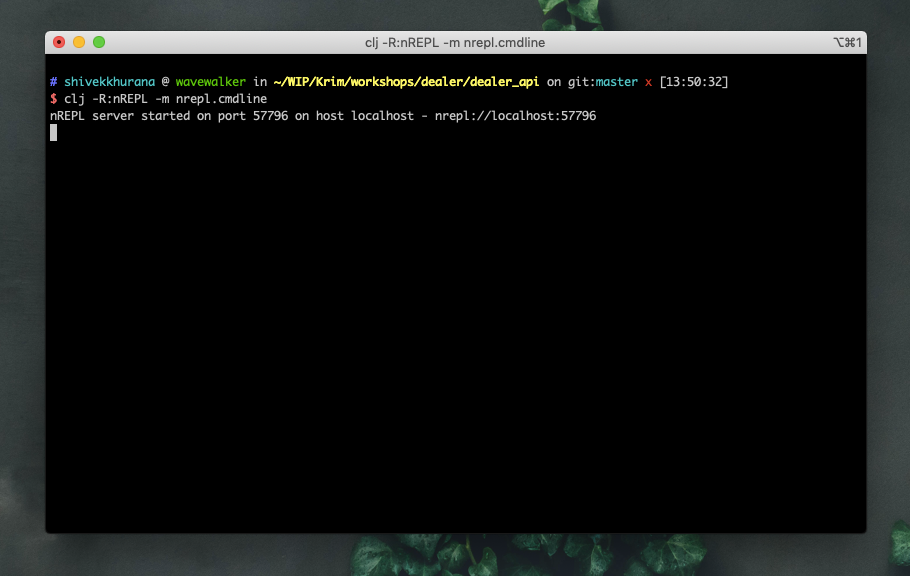
To start the nREPL, run the following command in the root of your project:
clj -R:nREPL -m nrepl.cmdline
You should see a REPL running as follows:
It might be hard to remember the command to start the REPL, so we can create a bash script to start the nREPL for us. Create a file called repl and place it in the bin folder in the root of the directory:
$ ls
deps.edn  resources src test.log
$ mkdir bin$ cd bin$ touch repl
$ echo "clj -R:nREPL -m nrepl.cmdline" > repl
$ chmod +x repl$ cd ..
Now, you can start the REPL by executing the newly created file:
$ bin/repl
nREPL server started on port 57764 on host localhost - nrepl://localhost:57764
(The bin/repl idea was inspired by juxt/edge).
Next, you’d need to connect to this server from within your editor. There are multiple plugins available to serve as a REPL client.Emacs has Cider. VS Code has Calva. IntelliJ has Cursive. Vim users can go home. And all other editors will have a Cider equivalent.
Once you have it set up, you should be able to evaluate forms directly from your source in your REPL.
I’m an Emacs user and if you too happen to use it, you can connect to the REPL using:
M x
cider-connect
VS Code users can use this guide to connect to nREPL and Cursive users can refer the official docs.
The realm of inline eval
I must tell you, that there is no going back after this point. If you want, stop now. But what you are about to witness might just get to addicted.Inline evaluation means executing a piece of code inside your editor.
 Inline Evaluation Demo
By evaluating code inline, you can skip (reset) and just eval the updated form inline. You can also test the functions you are writing without leaving your editor.
Starting the API from the REPL
We have the go and reset methods defined in core.clj but by default, the REPL is started in the user namespace. If we want some functions to be available in the REPl, we can define it in that namespace. It’s also handy to define dev functionality like migrations, rollbacks, seeds etc.
Create a file called user.clj in src directory. Note that this file can be anywhere on the classpath defined in deps.edn . Notice how we have copied the go , halt and reset functions here (from core.clj ). It makes more sense since it’s not directly related to the application. You can go ahead and delete these functions from core.clj .
;; In src/user.clj
(ns user
  (:require [dealer-api.core :refer [start-server]]
            [io.pedestal.http :as http]
            [clojure.tools.namespace.repl :refer [refresh]]))

;; For interactive development
(defonce server (atom nil))

(defn go []
  (reset! server (start-server))
  (prn "Server started on localhost:8890")
  (prn "Enter (reset) to reload.")
  :started)

(defn halt []
  (when [@server](http://twitter.com/server)
    (http/stop [@server](http://twitter.com/server))))

(defn reset []
  (halt)
  (refresh :after 'user/go))
You need to restart the nREPL and Connect one last time. After this point, you’d never need to leave your editor.After starting the nREPL and running Connect from your editor, you’ll be presented with a user > prompt. Now you can call the (go) and (reset) functions here.
Building the POST /drugs route
The process is the same as the GET route. Write SQL, write a handler, connect the handler to the route.
Write SQL to insert a new post
In src/dealer_api/sql/drugs.sql add the following:
-- :name new-drug :insert :1
INSERT INTO
drugs(name, availability, price)
VALUES(:name, :availability, :price)
RETURNING id;
The :name, :availability and :price signify variables. These are provided by the caller in a map passed as the second argument.
Create Spec to validate request body
The POST route consumes data sent using an API. It’s a good practice to validate the shape of the data. To do this, we can use Clojure’s spec as follows.
;; (:require [clojure.spec.alpha :as s])
(s/def ::name string?)
(s/def ::availability int?)
(s/def ::price (s/or :price int?
                     :price float?))
(s/def ::drug (s/keys :req-un [::name ::availability ::price]))
We’ll not dive deeper in the world of spec in this post.
 Checking that spec works with inline eval
Write the handler
Unlike GET route, this route depends on request, so instead of using a _ we’ll accept the request as the first parameter:
(defn create-drug [request]
  (let [new-drug (select-keys (-> request :json-params)
                              [:name :availability :price])]
    (if (s/valid? ::drug new-drug)
      (let [[_ id] (sql/new-drug db new-drug)]
        (http/json-response {:msg "Drug created successfully."
                             :id id}))
      (assoc (http/json-response {:msg "Please send a valid drug."})
             :status 400))))
- The
letdefinition pulls out the drug data from the request. s/valid?checks the drug to valid, returns an error otherwise- If the drug is valid,
sql/new-drugdata creates a new record in the db and returns 200 OK.
Connect the handler to the POST route
;; (:require [io.pedestal.http.body-params :refer [body-params]])
(def routes
  #{["/drugs" :post
              [(body-params) dealer-api.drugs/create-drug]
              :route-name :post-drugs]
    })
Here, instead of passing a single handler as we did for the get route, we pass an array of handlers. All but the last element of this array are interceptors. Interceptors let you modify the context map. In this case, we use the body-params interceptor to parse the params sent by the client.
Test the post route
You might have to (reset) to get all your changes in the build.
// Test if route throws 400 if bad data is sent

$ curl -X POST -H 'Content-Type: application/json' -i http://localhost:8890/drugs --data '{"name": "Non"}'_HTTP/1.1 400 Bad Request
Date: Wed, 15 Jan 2020 12:07:20 GMT
...
{"msg":"Please send a valid drug."}

// Test if a drug is created if correct data is sent
$ curl -X POST -H 'Content-Type: application/json' -ihttp://localhost:8890/drugs --data '{"name": "Non Existant", "availability": 104, "price": 56.79}'_HTTP/1.1 200 OK
...

{"msg":"Drug created successfully.","id":20}
Homework!!
The had to read a ton of docs and source code to get the POST route working. Even more so to setup the REPL from scratch. This is something you’d rarely do manually, but it never hurts to know how things work and are put together.
As an assignment, you can practice implementing a PUT and a DELETE route for drugs. The source code is available on Github.
Conclusion
The aim of this series was to act as a template for Clojure initiates. I faced a ton of problems when I got started but was lucky since my company has the best Clojure talent just a Slack message away.Please share these posts with people who’d like to learn Clojure. Let me know if you have any suggestions.